
USA -(Ammoland.com)- This is part three of a series of articles. If you missed them you can read part one here, or part two here.
With all three pieces of the wood grips and wood trigger guard complete, it was time to tackle either the rail panels or the stock. Since the rail panels seemed much less daunting, we decided to start with them.
As with all the previous wood components, we started by selecting wood pieces that we thought would look good on the front of the rifle. We wanted our wood rail panels to cover the left, right and bottom M-LOK sides of the rail, much like conventional rail panels available from a variety manufacturers.

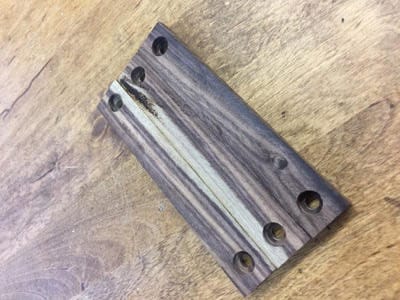
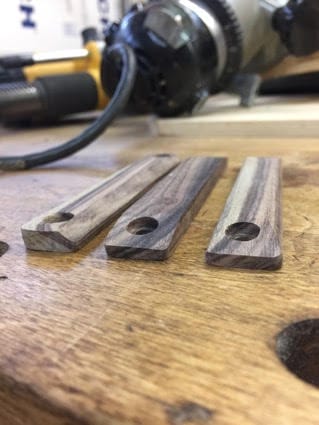
We cut the three pieces to their rough shape, 5/8 of an inch wide, 4 ½ inches long and 3/16 of an inch thick and marked locations for the screw holes.
Then, we drilled the holes and countersinks in each end of the panels to accept the Magpul T-Nut M-LOK Screws we were using to attach the panels to the rail. With all the major cuts made and holes drilled we began using a variety of sanders and Dremel bits to shape the rail panels to be comfortable in hand.

Compared with shaping the wood grips, shaping the rail panels didn’t take long. The rail panels were now ready for final sanding and sealing, so we began working on the toughest piece of the build: the wood stock.
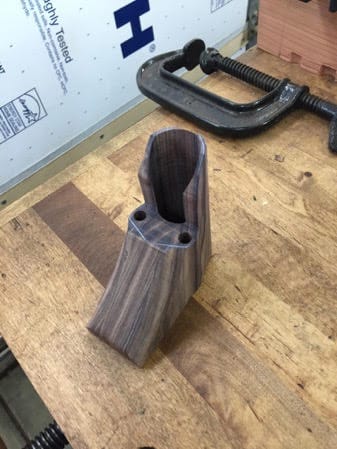
We had previously glued and rough cut the stock to a basic square shape so it was time to drill the holes for the buffer tube as well as the two connecting arms. We made a basic template for each of the holes and very carefully used the drill press to open each one; starting with the buffer tube hole.

Then, from the back end of the stock, we used a smaller drill bit and countersink to connect the arm holes in a way that would allow us to insert screws from the back of the stock and secure it to the arms.
Then it was once again sanding/Dremel time to turn our block into a functional and comfortable stock. The most intrigue part of the stock is wood above the buffer tube.
There is very little space between an AR-15’s buffer tube and charging handle, which meant we needed to be especially careful when shaping the top of the stock. All of the other sides had a fair amount of wood to work with giving us the freedom to shape the stock how we best saw fit.

The wood AR-15 project is almost complete, so if you’d like to see pictures of how the rifle looks now, head over to their website.
If you’d like to learn more about the build process checkout Black Wood USA’s Blog.
Page Links:
https://www.blackwoodusa.com/wood-rail-panels-ar-15
https://www.blackwoodusa.com/wood-stocks-ar-15
About Black Wood USA:
BlackWoodUSA.com was started as a platform to tell the story of building the furniture for our wood AR-15 project. Black Wood USA’s mission is to complete the Wood AR-15 Build, show how the furniture is made and explore the possibility of producing the components for sale.
