By Tom McHale

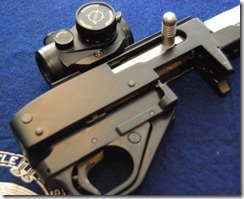
USA –-(Ammoland.com)- We’ve completed 3 steps out of the 5 planned for this Ruger 10/22 customization project. As my teenage kids would say, we’ve got “one sick rifle” at this point. As you’ll see from the photos, we’ve put a temporary optic on it for testing as the bull barrel has no iron sights.
What’s next?
How about an extended charging handle and recoil rod? Even with the temporary optic mounted, it’s ever so slightly inconvenient to reach the standard bolt handle. Since this is a benefit gun for Project Valour-IT, let’s make it awesome.
With some help from the gurus at Brownells, we chose the Volquartsen Extended Bolt Handle and Recoil Rod. From Volquartsen’s specs:
The Extended Bolt Handle features the same shape and design as the bolt handle featured on our fully machined bolts. This handle has also been extended .25″ for faster, easier operation. The recoil rod is polished, hardened and coated with a proprietary finish. This finish is not only extremely hard but also contains lubricating features to create an extremely smooth operating guide rod. This coated recoil rod reduces friction which improves both feeding and ejecting. A recoil rod spring is also included. This spring has been cryogenically treated to withstand years of use.
Let’s get started!
| If you’ve been reading along, you should remember how to do the first step – removing the barreled receiver from the stock. To refresh your memory, see the first article. As always, be sure the rifle is completely unloaded (chamber too!) before starting. Just remove the single screw that holds our new stock to the receiver and gently lift the barrel from the muzzle end first. | |
| To get to the bolt handle, we need to remove some stuff. First, we need to remove the trigger housing that we installed in the last step. To do this, push the retaining pins out, or at least far enough through the receiver to allow the trigger assembly to drop out. | |
| Now you will see the bolt in the upper portion of the receiver. While you’ll be able to move it back and forth, you won’t be able to remove it as there is a large solid pin at the very back of the receiver that prevents full travel. Gently punch this pin through and out of the receiver. | |
| Now, if you push the bolt all the way to the rear of the receiver, you’ll be able to remove it. It’s a tight fit and the bolt needs to drop out ‘as is’ without much angle, so it might be easier to turn the receiver upside down and let it fall into your hand. | |
| You can actually remove the existing bolt handle and recoil rod and spring by simply lifting up the front of the bolt. Go ahead and completely remove the bolt though. That will make the installation of the replacement bolt handle much easier. | |
| Hey! Now that you have an empty receiver, this is a great time to scrub any gunk from those hard-to-reach places. | |
| The new bolt handle and recoil rod assembly drop into place as shown. Be sure the back end of the recoil rod is captured into the notch in the receiver. | |
| Now you’re ready to drop the bolt back in. Retract the bolt handle as the bolt has to drop onto notches in the bolt handle itself. | |
| Replace the large pin at the upper rear of the receiver first to make sure the bolt is secured. Then re-install the trigger housing assembly and secure it with the two retaining pins. | |
| Now just mount the barreled receiver back to the stock and you’re ready to go with a new Volquartsen Extended Bolt Handle. Piece of cake. |
That’s it! We’re done! No parts left over. No blood. All in all another successful project.
Join us next time as we add the final piece of gear to this customized Ruger 10/22. We’re working with the great folks at Brownells to select just the right optic. If you have any ideas, let us know in the comments!
Remember to keep track of Soup it up for Soldiers here. As soon as this rifle is done, it’s getting shipped back to Ruger where it will be photographed and placed for auction on Gunbroker.com with all proceeds going to Project Valour-IT of Soldiers Angels.


