by Andy Lander, NRA Training Counselor Program Coordinator Note: This article was originally posted on NRA Blog


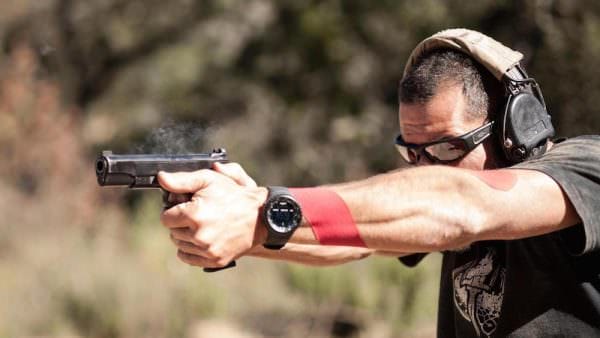
USA -(Ammoland.com)- Gripping a semi-automatic pistol correctly is essential to be able to shoot precisely and quickly. A proper grip will determine whether you will have proper finger placement on the trigger and if you will be able to shoot and control the gun through recoil, known as recoil management.
For beginners and novice shooters, before you start drawing pistols from Kydex or leather holsters, you must first learn how the gun should properly be placed in the hand. Once the basics of properly gripping the pistol are established, we move into more nuanced behaviors, such as learning how to establish or build the master grip in the holster all the way through the four-count draw stroke.

When teaching a new student, I have them grasp the pistol with the non-firing hand behind the muzzle of the pistol, then make a “V” with the thumb and trigger finger of the firing hand. I then instruct the student to place the gun into the web portion of their hand, wrapping the lower three fingers on the grip of the pistol.
It is important to note that the shooting hand should fill up the entire backstrap of the pistol. To a baseball batter, this would be similar to choking as high as you can get on the grip of the bat. There should be no gaps between the top the web of the hand and the top of the backstrap on the frame of the pistol. The thumb of the shooting hand should be “flagged,” or in a hitchhikers position in order to make room for the other hand to be placed on the pistol.
For a pistol that utilizes a frame-mounted safety, such as those on John Browning’s famous 1911 platform, the shooting hand thumb should rest on top of the safety. This is important because the shooter does not want to accidentally re-engage the safety while shooting the gun.

The non-firing hand should approach the bottom of the trigger guard at roughly a 90-degree angle. The index finger of that hand should touch, or index, off the bottom of the trigger guard on or about the first knuckle. As the shooter pushes their hands towards the target, both thumbs will roll together forward into a stacked position. Tension between the hands should be firm, yet comfortable. Gripping the pistol with too much tension can cause fatigue and disrupt trigger control.
Depending on the size of the shooter’s hands and the size of the gun, care should be taken to avoid placing your non-shooting hand index finger on the front of the trigger guard. This leads to bad shooting habits and abnormal muzzle movement, which will cause shooting errors that increase exponentially as the target moves further away. However, if your hands are much larger than the pistol frame, a finger or part of a finger on the front of the trigger guard may be beneficial to get a better grip purchase on the firearm and may be more comfortable.
Good marksmanship comes not from merely buying a gun and shooting it often, but from learning and understanding the fundamentals and training on them. Before you expect to become a competitive champion or crack-shot pistol marksman, you’ll need to know (and be able to replicate) how to grip your pistol.
Want to see proper grip in action? Check out this episode of NRA Firearm Science, in which accomplished shooter and former 3-Gun champion Tommy Thacker demonstrates proper semi-automatic pistol grip!
