By Tom McHale
Editors Note : Caution, ammunition reloading can be very dangerous, read our “Reloading Disclaimer“ .


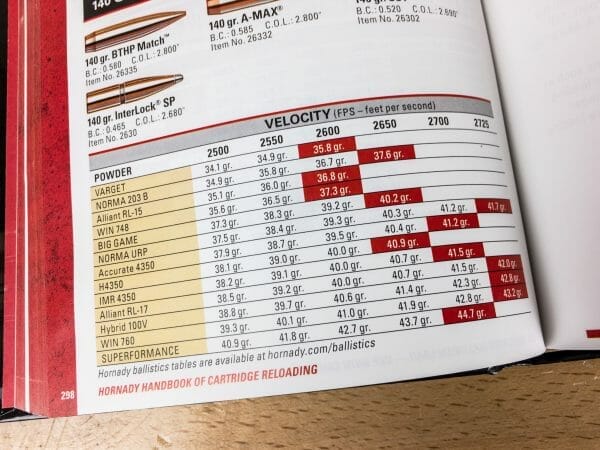
USA –-(Ammoland.com)- Unlike politics, reloading for precision often has nothing to do with a quest for ultimate power. Probably due to some deep-seated primal instinct, we reloaders tend to immediately look to the far right of the load recipe chart in books like the Hornady Handbook Of Cartridge Reloading. You know, where the max load (and highest possible safe velocity) figures reside.
That’s not necessarily the wrong approach depending on what you’re trying to do. For hunting, you may need every extra foot per second and resulting kinetic energy output. Even for long range target shooting, you may be looking for another fifty or hundred yards of supersonic flight to lengthen your predictable range.
However, high velocity doesn’t necessarily equate to repeatable precision or consistent impact points. It might, or it might not. What it does equate to predictability is consistency.
Before we get started, realize that we’re just touching the surface on these topics. Many of them would require a dedicated book to explore fully, so we’re going to touch on what some of the precision factors are and provide some hints to improve your reloading results.
One more thing. We’re using the word “precision” frequently here. By that I mean the ability of a load to act the same way with every shot by sharing the same velocity, launch, and flight characteristics. Once you have a “precise” load, it’s an easy task to make adjustments to put those small groups on target for accuracy.
Find the Right Powder Charge
To achieve precision, it’s essential to find the right gun powder charge for each combination of caliber, powder type, primer type, and projectile. It boils down to getting the same velocity from every shot. If the first shot leaves the barrel 75 feet per second faster than the second, you may be able to get great 100-yard groups, but your 1,000 yards groups will be all over the target vertically.
To find the “flat spot” where velocity and vertical dispersion are ideal, you want to see the powder charge weight where small differences, either way, don’t make a big difference in speed. For example, 48.4 grains of Jimbo’s Boom Blaster powder (<– I made that name up) may yield a velocity of 2,950 feet per second. You may also find that 48.8 grains of the same powder yields you a velocity of 2,955 feet per second. That .4-grain difference only resulted in a velocity difference of five feet per second. That tells you that your ideal powder charge weight is probably right in this range. A little variance won’t spoil your results.

If you don’t have a chronograph to measure velocity (you should if you’re reloading!), then you can find the flat spot on paper. Put a target 300 yards or more (100 yards isn’t enough range to show variance) down range and shoot groups with different charges. The powder weights that result in the smallest vertical groups show your flat spot. If you want to deep dive on this topic, look up Optimal Charge Weight (OCW) or Ladder Testing on the interwebs.
Powder Charge Consistency
Once you’ve found the ideal charge weight range, you’ll want to make sure each and every charge is the same. Ask for birthday gift certificates to Brownells to get yourself something like an RCBS Chargemaster so you can easily weigh every charge. If you measure charges using a kitchen utensil, you’ll never achieve consistent velocity and precision.
Case Weight and Headstamp
Since the pressure and resulting velocity result from the output of a burn in a confined space (the cartridge case), it’s also important to make sure every container is identical. Different brass manufacturers make their brass cases differently, and thickness can vary, so the interior shape and volume are bound to be different as well. Be sure to sort your brass by manufacturer headstamp, so every batch uses cases that are as identical as possible.
While you’re sorting your brass, be sure to also keep track of its usage over time. Every time you fire a cartridge, the brass stretches both longitudinally and in circumference. Over time, this too will result in interior profile variance. If you mix new brass with stuff that’s been fired eight times, you might see inconsistency as well.
Bullet Runout
If you bowl at a lane that has those gutter bumpers, you can drunk heave a ball down the lane, and eventually, it’ll hit something at the end. Even though those guards keep knocking the ball back into the alley, it’s unlikely you’re going to bowl many perfect 300 scores. The same applies to a bullet that’s not seated perfectly vertically in the brass case. Even though the rifle bore “should” straighten it out as it bounces off the sides of the barrel, you’re going to suffer from inconsistent groups.

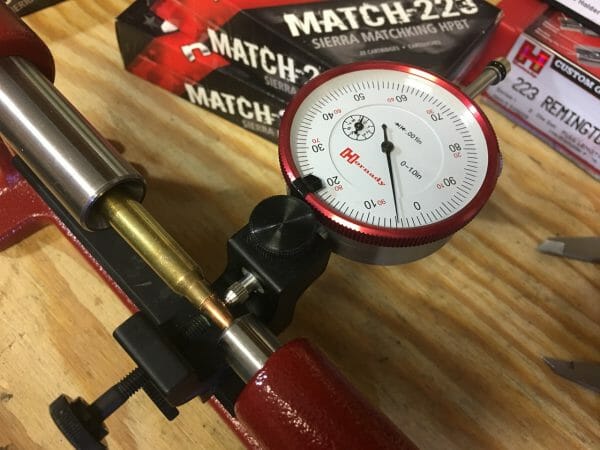
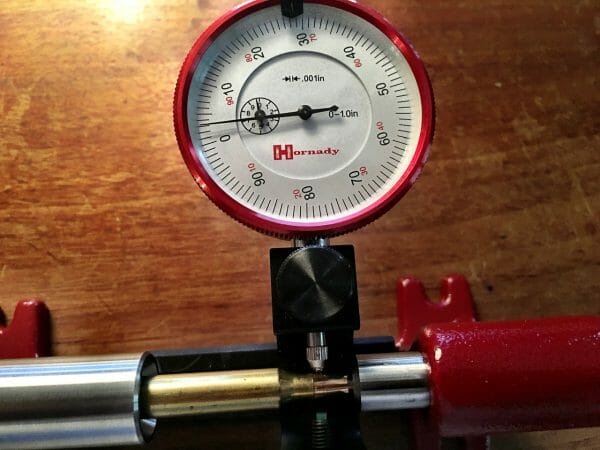
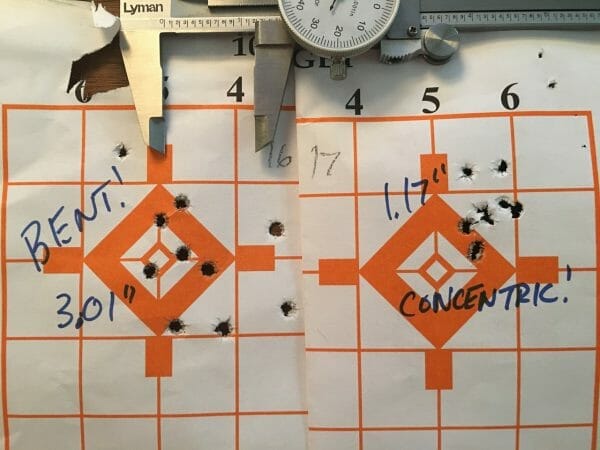
Bullet runout indicates how “crooked” a bullet is in its cartridge case. I did an interesting experiment on bullet runout using a Hornady Concentricity Gauge. This tool rotates a cartridge and measures how well the vertical centerline of the bullet is aligned with the case. It also allows you to make corrections to straighten out errant bullet seating. I deliberately adjusted a pile of Norma Match 223 rounds to be out of whack by just five or so thousandths of an inch. I took others from the same box and tweaked them to have a near perfect alignment to within just under 1/1,000th of an inch. At just 100 yards using an Armalite M-15 rifle, the “bent” bullets produced a ten-shot group of 3.1 inches. The straight bullets shot a ten-shot group of just 1.17 inches.

To avoid manually fixing every cartridge you reload with a concentricity gauge; and you can invest in quality dies. Like everything else, you get what you pay for. By taking simple steps like de-priming before you resize, using a high-quality resizing die, and especially using a precision seating die like a Forster Bench-Rest Seating Die, you can make sure that your bullets go in straight and true.
Seating Depth
Conventional logic says you should seat bullets to a depth where it’s close to, but not yet engaging the rifling in the barrel. That may be true for your rifle and load. Or it may not. The important factor is to test it yourself to see what your rifle and bullets like. To simplify the process, check out the Hornady Lock-N-Load O.A.L. Gauge.
That will help you identify the space you have to work with ahead of the barrel’s rifling. That Forster Bench Rest Bullet Seating Die will help you seat to the correct depth identified by the O.A.L. Gauge.

Chamfering and Deburring
A straightforward and quick step to perform on each cartridge case can make a big difference too. By chamfering and deburring your case mouths before bullet seating, you can ensure that the bullet seats smoothly and leaves the case uniformly. A little goes a long way with this process of every-so-slightly beveling the inside and outside of the case mouths. That process not only guides the bullet into the case mouth but removes burrs left by the case trimming process. Again, it’s all about consistency, and this step helps restore fired brass to near factory (or better) condition.
And More…
There’s a long list of steps that can help improve precision including case annealing, primer pocket uniforming, and more. While all of these things can help, we’ve started with some of the steps that can make the most impact with minimal investment in specialized equipment. Above all, always think consistency. The more you can keep all variables the same from cartridge to cartridge the better results you’ll achieve on the range.
About
Tom McHale is the author of the Practical Guides book series that guides new and experienced shooters alike in a fun, approachable, and practical way. His books are available in print and eBook format on Amazon. You can also find him on Facebook, Twitter, Instagram, and Pinterest.
