Opinion
USA – -(AmmoLand.com)- I’ve been using the Federal Air Marshal qualification course of fire as a fun and challenging training aid. This routine isn’t easy—only a small percentage of concealed carriers will pass it without serious practice.
What makes it a great training tool is that it requires absolute and legit concealment. I’m not talking BS concealment like a floppy shoot-me-first vest or an IDPA barely competition-legal setup.
The litmus test is clear. Could you walk onto an airplane, like an Air Marshal has to do, and suffer all the crammed seating contortions, with a zero percent chance of someone spotting your concealed handgun? In other words, to run the course fair, you have do it from legit, no cheating concealment.
Passing the course requires drawing (fast) from deep concealment and hitting small target zones. Oh, and one more thing. You have to run the course cold. If you blow a single time or scoring mark anywhere in the routine, you fail and have to try another day again. No practice runs, repeated stages, or do-overs of any kind.
Most folks agree that less than one percent of handgun shooters can pass the test legitimately. If you can, congratulations! If you can’t, passing this qualification is a great training and skills objective.
What I really like about it, other than raw proficiency development, is that it exercises your concealed carry gear and methods. If there’s a flaw in the works, this course of fire will expose it, especially if you do it on different occasions, under different conditions, and while wearing different types of clothing. I’d argue that clearing concealment garments present the lions’ share of the challenge of executing a fast and perfect draw.
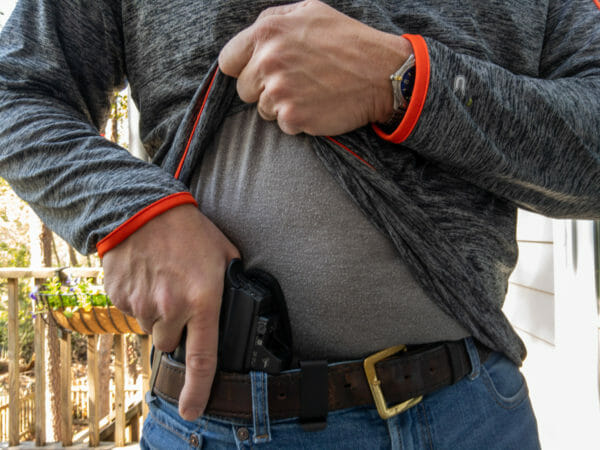
I made a not-yet-New-Years resolution to run through some stages with my actual everyday carry gear and clothing. I carry most of the time using an untucked t-shirt or button-down, so with my normal four-o’clock inside-the-waistband position, I have to reach all the way across my body with my support-side hand and lift to the cover shirt high enough to guarantee a snag-free draw. To add some time stress and objectively measure my results, I used the new Mantis X10 system. This nifty little device can attach to the base of a magazine, and it’ll analyze your draw and fire motion 17 ways from Sunday. You can read more about it here.
Anyway, I found two potential flaws with my traditional inside-the-waistband carry in the behind-the-hip position. First, it’s a long reach across the body with the support hand to lift a cover shirt high enough to draw. That takes a shocking amount of time. I didn’t appreciate just how much time until I started to experiment with the Mantis. Second, there is a definite “error rate” when drawing from real concealment the farther back the gun is located behind the hip. Depending on shirt material or whether it’s wet or sweaty, I was fouling up about one out of every ten or so draws, at least partially. The gun would get hung up in fabric, the shirt would catch on the gun or holster, or some other such thing would interfere with a smooth and fast draw and add to my times. When practicing, that’s no big deal, but it’s not something you want to happen in a real-life encounter.
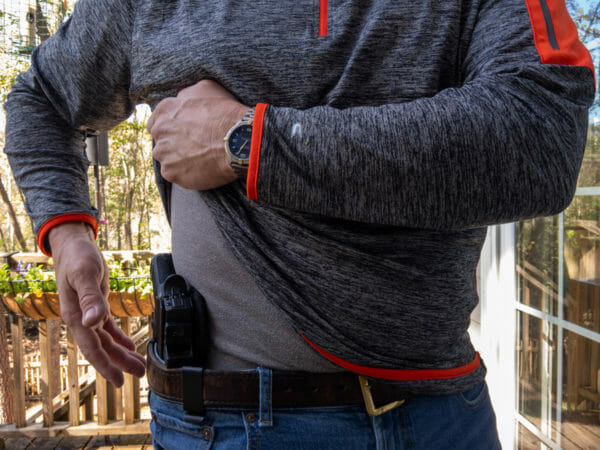
Here’s the bottom line. Drawing from “not concealment” is easy. With some repetition, you can develop a consistent and fast motion. When carrying using legit concealment, the biggest gotcha variable is the cover garment clearing portion.
To alleviate these gotchas, I started to do some experimentation with holster placement. Given that the long reach for my support hand to the opposite four o’clock position and subsequent garment clearing was the weak point in the system, I tried a couple of IWB position options more towards the center.
Appendix Position
I’ve tried appendix carry at the one o’clock location and found some pros and cons to that method.
It’s blazing fast on the draw. It’s a short reach for my firing hand, so there is little movement required to get a grip and start the motion. I do notice that I have to angle my wrist laterally to get a positive grip. It’s awkward and unnatural, so that’s a small drawback.
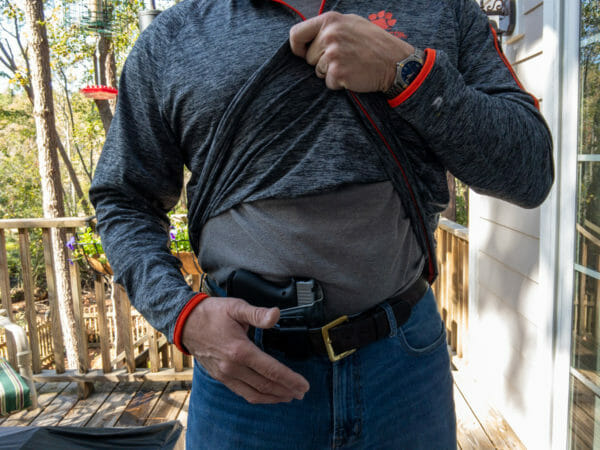
It’s virtually snag-proof. Since my left hand is so close to the gun position, it’s a short and easy reach to lift a shirt completely out of the way without resorting to physical contortions. Raising a cover shirt clear to your sternum is a lot easier from this location than all the way around the strong side hipbone.
It’s moderately comfortable. Nowhere near as effortless as behind-the-hipbone carry, but it’s not the worst method I’ve tried. The pressure against my upper leg when I sit doesn’t hurt but is slightly annoying.
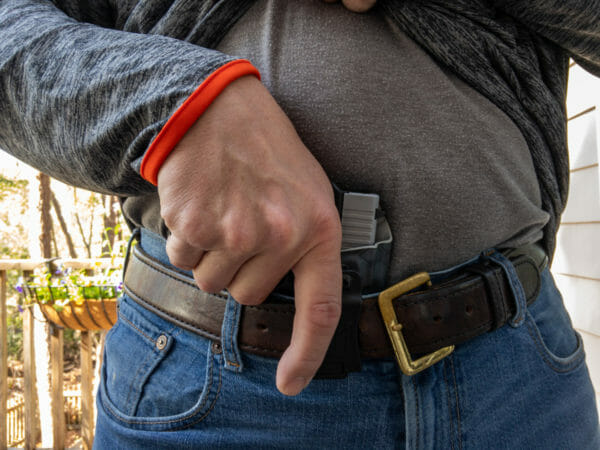
In theory, the muzzle is pointed at a very dangerous place. Not the anatomy everyone jokes about, but toward a major artery. With proper procedures and techniques, there’s little risk, but it’s discomforting nonetheless.
Hippendix Position
Let’s call “hippendix carry” as an IWB position at about two or two-thirty on the clock face. That would place the pistol in front of the hip bone, but well on its way around your front corner of the body. The pros and cons to hippendix carry include:
The muzzle points well away from the major blood vessel danger area, especially if you configure your holster with a slight forward cant.
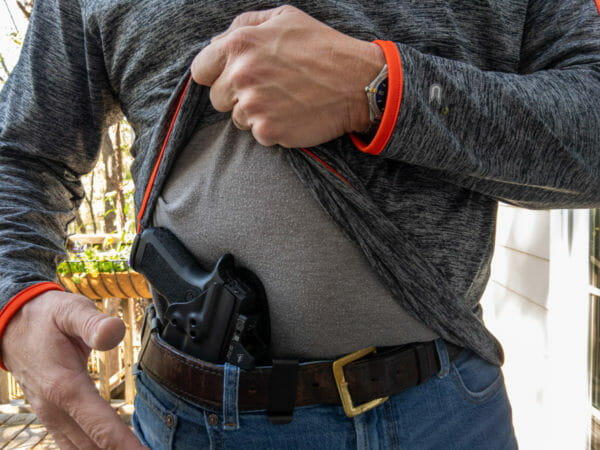
Comfort? Well, that can be a challenge. I’m still experimenting, but so far, hippendix carry is more physically intrusive than either behind the hip bone or appendix. The gun and holster seem to apply a lot more pressure with the same level of belt tension when sitting. There’s also moderate pressure when standing thanks to the placement of all that skeletal structure in the pelvis area.
Speed and reliability are excellent. Since the reach for your support hand to clear the cover garment is significantly shorter, the clear and draw motion is faster, and you’re less likely to run into a snag. It’s not quite as fast and easy as appendix, but close.
The position interferes with the strong side pants pocket access. That’s something to consider and test.
So, What’s the Answer?
Your mileage may vary because we’re all built differently. For me, the evaluation of IWB position nets out like this.
Appendix Position
Appendix carry is the fastest on the draw and least likely to cause snags. The gun position also provides excellent weapon retention and peace of mind because it’s in your workspace. You know the status at all times. You’re also less likely to bump your handgun on something while walking around, and there’s less risk of cover fabric printing.
The appendix position is also the fastest for me. There are a million variables at play, but when testing with most of my real cover clothing, it was easier for me to be in the neighborhood of two-tenths of a second faster than traditional IWB in this position. Most of the speed gain appears to come from easily clearing the cover garment and shorter reach for both clearing and drawing hands.
Appendix carry still gives me a bit of the heebie-jeebies. The muzzle is pointed right at the upper part of your femoral artery. With a good holster and proper procedures, it’s virtually impossible for a negligent discharge to occur, but if it does, you’re dead. Literally. That high up, a self-applied tourniquet won’t help you. You’ll be unconscious in less than 60 seconds and taking the room temperature challenge shortly thereafter. Unlikely? Yes. But if I’m, to be honest, it still makes me nervous, especially when pondering drawing and re-holstering in a stressful situation.
As a side note, a recent study on negligent discharges in the law enforcement community showed that about 17% of them occur during holster manipulations. Ponder that as you will.
Hippendix
Since I was keen on obtaining the speed and snag-free-draw benefits of appendix carry while losing the heebie-jeebie, “the muzzle is pointed at my big artery” factor, I gave the hippendix (2 o’clock) position a legitimate try. I used multiple guns, multiple holsters, and experimented with holster cant angle adjustments. And the bottom line?
I can’t do it. The muzzle is fine as it angles out toward the side. The grip, however, is smack in the middle of the hip joint area. There’s just too much interference and pressure in most positions. While the draw is easy and about one-tenth of a second faster than from the four o’clock position, it’s a real pain in the hip.
Oh well, it was a nice theory.
Traditional IWB
After all the experimentation, I think I’m sticking with IWB carry in a more traditional position. I have found it beneficial to cheat on that four o’clock location a bit. Moving from four to three o’clock with the right holster makes a big difference in speed and really cuts down on the potential for cover garment interference. In practice timing with the Mantis X10, I quickly reached equivalent speeds to the hippendix draws.
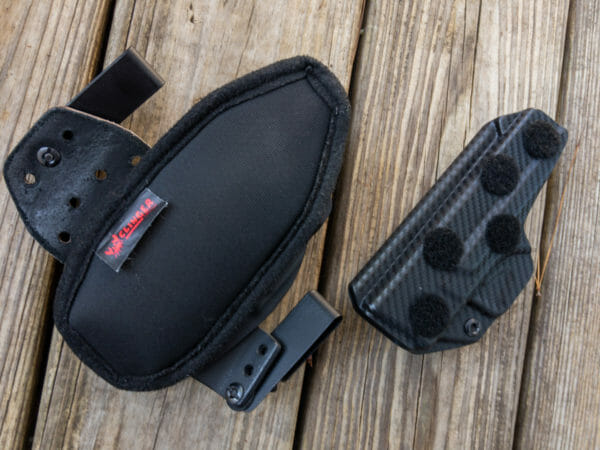
To make it work ideally, I’m using No Print Wonder holsters from Clinger. Since these Kydex holsters are designed to draw the gun grip in tight to the body, the three o’clock positioning still conceals well as there’s no grip butt jutting outward. I have added a new twist. The company recently launched its Clinger Cushion accessory. This slim padded layer can be used with virtually any Kydex holster to provide a protective barrier between hard plastic and metal and your soft body parts. The way it installs, you can apply hook and loop dots to all of your Kydex holsters and move the cushion around to different rigs as needed. There are three different sizes to fit anything from subcompacts to full-size handguns. It’s a cool solution and well worth the $19.
I won’t say never, because appendix carry has some operational appeal in terms of security, concealment, and speed, but for now I just can’t get over that discomfort of the muzzle pointing issue.
About
Tom McHale is the author of the Practical Guides book series that guides new and experienced shooters alike in a fun, approachable, and practical way. His books are available in print and eBook format on Amazon #ad. You can also find him on Facebook, Twitter, Instagram and Pinterest.
