By Preston Bankson,
Learn from my successes, and my mistakes, as you build a custom reloading bench.
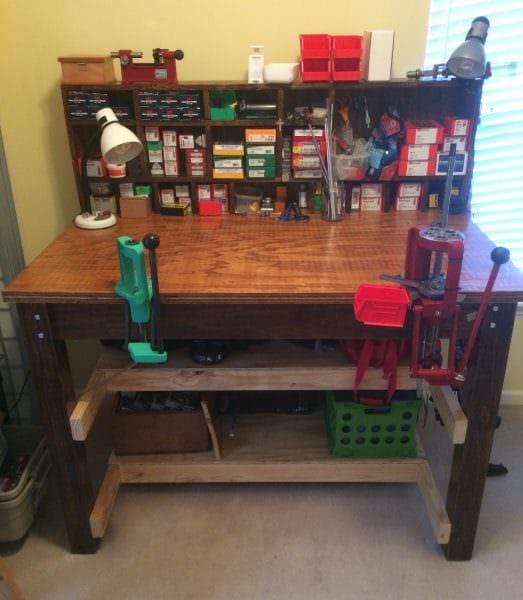
 U.S.A. – After a few years of reloading on modified garage shelving, I decided it was time to build a legit reloading workbench.
Upfront disclaimer: My bench resides in a spare bedroom. This means my bench features two particular features that I would change were it in a garage:
- I would bolt the bench to the wall
- My wife asked that I make a sincere effort to make the bench “as attractive as possible,” which I accomplished with precise measurements and wood stain.
Bench Do’s
Blueprint the bench – MUST DO
My wife comes from an architecture background and is a real whiz in software programs like AutoCAD, Google SketchUp, etc. In a few hours over drinks she modeled out my bench, and we figured out that some of the structural elements that I was planning wouldn’t work. This saved me time and money by eliminating build errors up front.
If you don’t have access to someone who can model on a computer (or you can’t spare $10 to bribe them with beer) Google SketchUp has a free version, and you can find tutorial videos on the internet. You could also draw a plan by hand and, if you go this route, I encourage you to draw it to scale.
Remember the adage, “measure twice, cut once.”
Go big or go home
My bench top measures 5’ x 3’, and I have yet to need more space than this. My top is as sturdy as can be and cheap too! I used two 8’ x 4’ sheets of ¾ inch plywood and cut them down to 5’ x 3’ and then glued and screwed them together.
Seal, if using wood
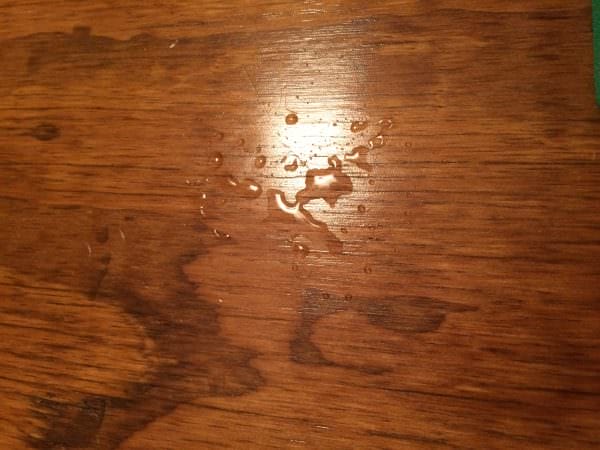
Most benches will be made from wood. Adding even one coat of polyurethane, like Minwax Fast-Drying Polyurethane, to the entire surface of the bench will smooth out the wood, seal it from moisture, and improve the look. For the bench top, I would recommend a few coats of sealant to prolong the life of this wood through years of exposure to solvents, gun oil, etc.
Put on weight – MUST DO
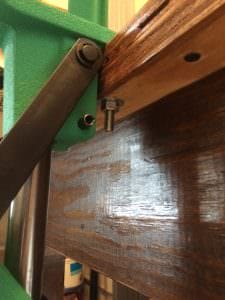
A key finding in my upfront research on bench building was that adding weight from the stuff you decide to store on or in your bench is critical to stability, especially if not bolting to a cinderblock wall or wood studs. In other words, design in places for your heavy gear and supplies.
Think through your press mount
No matter how you are making your bench top and attaching it to your frame, make sure to consider your reloading press mounting. The long story short is that I did not think these measurements through and instead of using three bolts and nuts to attach my single stage press, I had to use two lag screws and only one bolt. I ran a key piece of frame right under where my back two bolts would have gone, so I had to buy long lag screws to firmly secure the press to the bench.
Pro tip: Use liquid nails when mounting your press. This helped attach my lag screws to the wood.
Utilize built-in shelving – MUST DO
Adding shelving below and/or above the bench top is obviously good for storage and convenience. What I did not appreciate fully before researching my build was the large benefit of additional weight. The items I am storing on my bench weigh more than the bench itself. This additional weight adds rigidity to the frame and prevents flex when using your press.
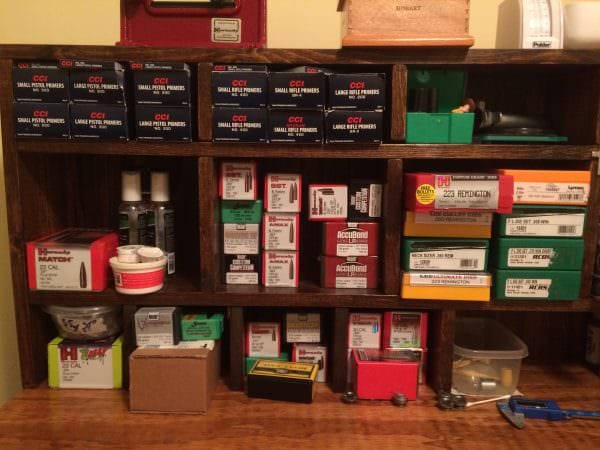
Take time to consider what you will store on the bench and where you want it to be located. It was well worth ten minutes spent measuring bullet boxes, primer boxes, die boxes, etc. and building shelving to best fit my needs. You can see in the picture above that the die boxes and primer boxes slide in perfectly.
Mount to the wall, if possible
This is a simple and cheap way to add rigidity and strength to your workbench. Also, when pulling press handles, the bench won’t tend to pull towards you.
Customize

This is probably the only reloading bench that you build for decades. Take plenty of time up front to think about features that YOU want. I added these features to suit my needs:
- Multi-Level Lip – Allows me to clamp accessories that would not fit on the full 1.5” lip of my bench top
- Stain
- Custom work height – Grab a friend and a tape measure. Stand up, grab your phone, and start typing a text –now pause and have your friend measure from the ground to the lower side of your wrists. This will be roughly the same height measurement as from the ground to your elbow. Whatever height you measure, subtract 3-5 inches and build your bench to that height. I am 6’2”, and I am incapable of expressing how much better it is for me to work on a 42” tall work surface than the 36” height which I had been working on. My young back is already singing praises.
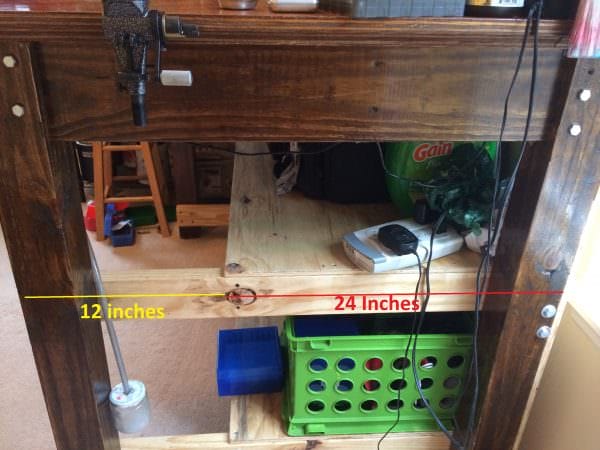
- Recessed lower shelving – This enables me to use a stool and have my knees sit comfortably under the bench top. While the bench is 36” deep, the lower shelving starts at the back and only comes 24” toward the front, leaving a nice 12” open area for my legs. Again, my back is rejoicing.
Bench Don’ts
Overcomplicate the structure
Per some of the above pictures, I utilized a strong, unique frame setup. While this was cool and improved the strength of my bench, it was a headache, required extra tools, creativity, and wood glue when pieces snapped… Building this again, I would have gone with a more simple attachment system between the legs and the upper frame.
Your uses, budget, patience, tools, and skill will determine how crazy your structure will be. I have become more of an advocate for the K.I.S.S. model – Keep it Simple, Stupid.
Stain
While the stain adds personality to my bench, this step added time and effort that could have been spent reloading or, preferably, unloading! If this were not going into the house, I would not have bothered to stain many or any surfaces; however, I would still seal the wood, for the reasons mentioned earlier.
Forget to update your model
If you decide mid-build that a certain change is a good idea, do it! But you MUST go back to your reloading bench plan and ensure that you epiphany will work (have a second party check your math/logic). If it DOES work, then you MUST update your model and delete the old one so that you aren’t referencing old data when you check the model.
See the ALL CAPS above? I may have made this mistake….. twice…. I was not a happy camper either time.
Forget to check your model often
Similar to what I just mentioned, I recommend having a physical copy of your bench plans with you while building. If you cannot or choose not to do this, at minimum check the plans regularly during the build to ensure you are on track and know your next measurements.
There you have it, the Dos and Don’ts of building a reloading workbench. Take your time and enjoy! Most reloaders are tinkerers by nature. Consider this a fun project for the next few months and get into it. As with most things in life, you get out of it what you put into it.
Some reloading Bench Premade Plans:
- https://accurateshooter.net/Blog/benchnrma.pdf
- https://www.americanrifleman.org/Webcontent/pdf/2009-6/200961885713-build_bench.pdf
- https://www.pinterest.com/pin/222154194097083995/
- https://www.somerssportsmen.com/bench.pdf
- https://www.zjstech.net/gunstuff/reloadbench.html
 About Preston Bankson
Preston Bankson is grateful to be a byproduct of upbringing by a hunting family and marriage to a shooting family. While he primarily hunts in his home state of South Carolina, he enjoys the occasional excursion to a waterfowl flyway or trip out West for deer. Since the introduction to his in-laws, Preston has educated himself on concealed carry and become an avid reloader. He enjoys perfecting reloading techniques which have produced big results in his hunting. When not pulling the trigger himself, Preston enjoys introducing these pastimes to others and dabbles in shooting competitions.
