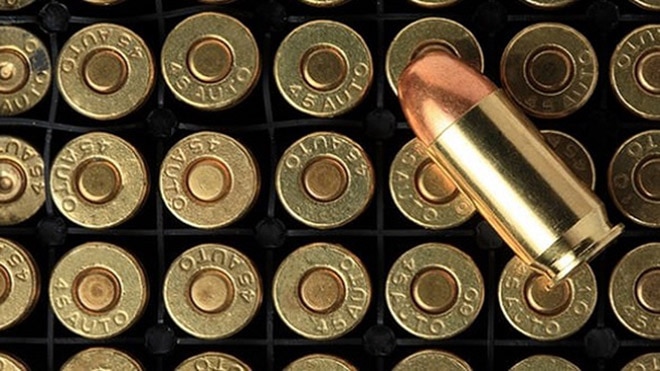
The art of handloading doesn’t need a reason. It only needs desire…
Traditionally, hunters and firearms enthusiasts take up the craft of handloading in order to mitigate the inherent costs of high volume shooting. Yet in recent years the price of cartridge components has risen drastically, making it debatable as to whether or not handloading is still a money saver. I say regardless of this diminishing ability to alleviate your shooting cost, assembling one’s own ammunition is still a rewarding and relaxing activity that offers a shooter the opportunity to craft custom ammunition tailored specifically to his or her own firearms.
The following is a photographic, beginner’s guide to handloading. While there will be some variation in the process depending on the make and model of the equipment you are using, the basics will remain the same. The guide covers loading metallic cartridges on a Lee single stage press using Lee dies. Manuals provided by manufacturers should be consulted prior to using any reloading tool.
Not covered in this how-to is shotshell loading or the use of turret presses or automated systems. The cartridge loaded in this guide is a .357 magnum with a 158 grain Hornady XTP bullet and charged with 17.0 grains of Hodgdon Lil’Gun.
Always remember, handloading is more of an art than a science. The method detailed below is what works for the author. As long as all safety protocols are employed, methods may be modified to suit personal tastes. Also, make sure you review the safety tips section at the bottom of the page.
Part I: Required equipment and components
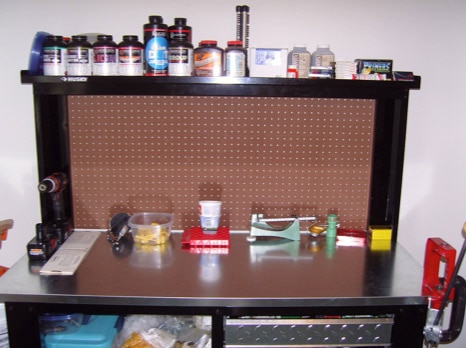
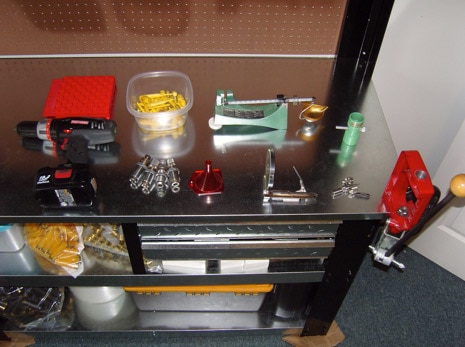
Required equipment for metallic cartridge reloading consists of (clockwise from upper left) a loading block, powder dippers, a powder scale, a powder trickler, a loading press, case trimming tools, a hand priming tool, a powder funnel, a set of dies, and a cordless drill. (Photo: Jason Wimbiscus)
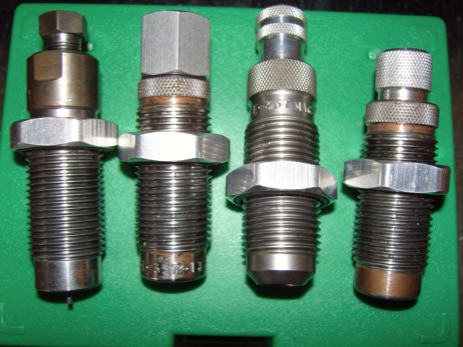
A die set, pictured here, will usually consist of (from left) a sizing and de-capping die, an expander die, and a bullet seating die. An optional and recommended die is a crimp die (far right). When loading straight walled pistol cartridges, a carbide die set will eliminate the need to lubricate cases during the sizing process. Most die sets include a shell holder that keeps the case locked to the press during loading. (Photo: Jason Wimbiscus)
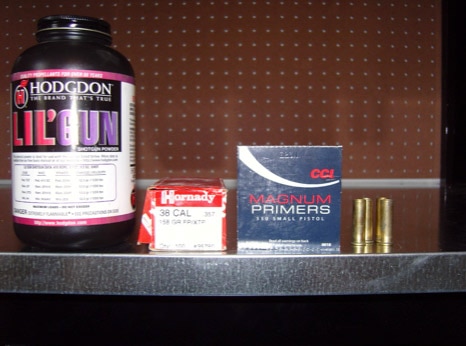
Required components include (from left) powder, bullets, primers, and cases. (Photo: Jason Wimbiscus)
Part II: Case prep
Step 1: Examine the cases
Before beginning the loading process, check all cases for such signs of wear as splits and cracks in the case wall. Even factory new brass should be examined for defects and damage. Discard any damaged or worn out cases.
Step 2: Resize and de-cap the case
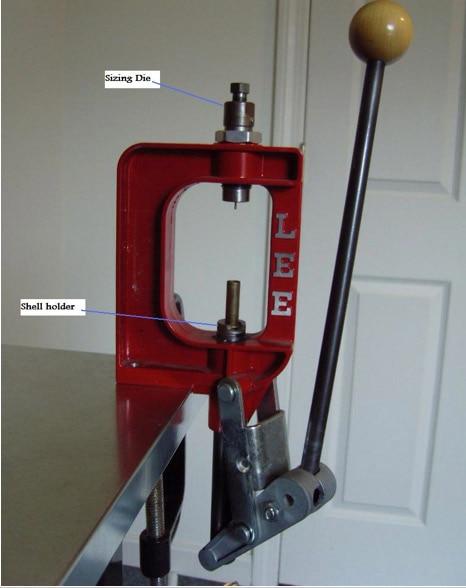
Screw the sizing die into the press and install the appropriate size shell holder onto the ram. Lock the case into the shell holder, pull down on the handle and with a free hand guide the case into the die. Apply pressure until the spent primer is ejected from the case. Retract the ram and repeat with the next case. Note: unless carbide dies are used, cases must be treated with a sizing lubricant. Failure to do so may result in a stuck case. Additionally, do not attempt to resize steel, aluminum, or Berdan primed cases as doing so may damage the die. (Photo: Jason Wimbiscus)
Step 3: Trim the case
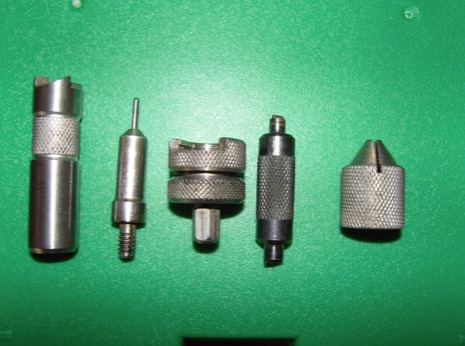
The photo above details the parts of a Lee case trimmer system. From left are the case trimmer, the case length gauge, the shell holder and lock stud, a primer pocket cleaner, and a case mouth de-burring tool. The case length gauge screws into the trimmer and the shell holder and lock stud adapt to a cordless drill. (Photo: Jason Wimbiscus)
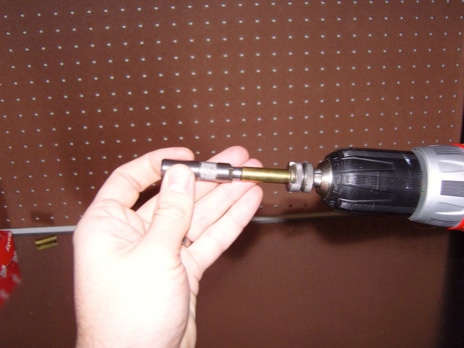
To trim the case, attach the lock stud and shell holder to a cordless drill set on low speed and insert the case length gauge/trimmer into the case mouth as far as it will go. Holding firmly onto the trimmer, run the drill until metal shavings no longer drop from the case mouth. (Photo: Jason Wimbiscus)
Step 4: De-burr the case mouth
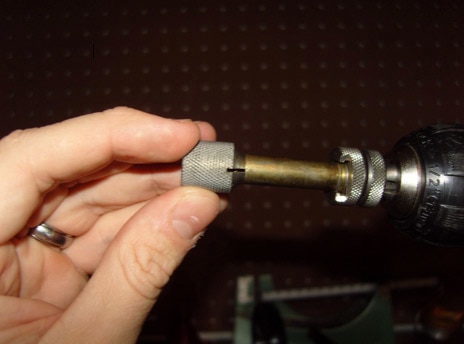
Using the de-burring tool as pictured above, run the drill until the case mouth is a clean edge. (Photo: Jason Wimbiscus)
Step 5: Clean the primer pocket
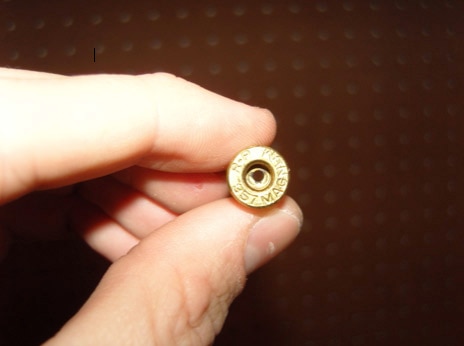
As mentioned, run the drill until the case mouth is a clean edge. Visually inspect the primer seat for obstructions and imperfections. (Photo: Jason Wimbiscus)
Part III: Re-prime and charge the case
Step 1: Load the priming tool
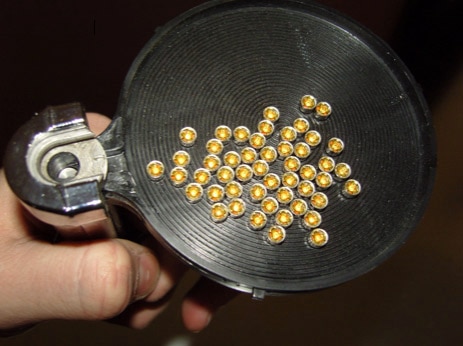
While a number of good tools exist for re-priming a case, the tool used in this guide is the Lee Auto Prime. Assemble the tool according to manufacturer specifications and place the appropriate sized primers on the tray. Tap the tray until all primers are smooth side down. A primer that seats backwards can cause problems if not caught before firing. Use care when loading the tray as dropped primers have the annoying tendency to bounce and roll out of reach. (Photo: Jason Wimbiscus)
Step 2: Re-prime
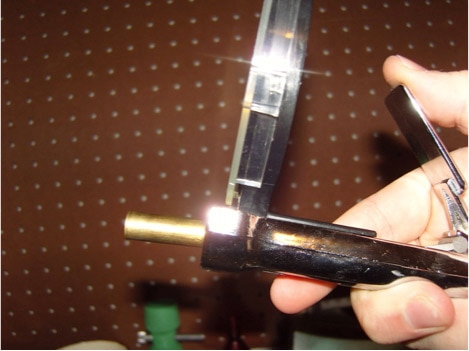
Lock the case into the priming tool and depress the lever. A ram will force a primer into the primer pocket. (Photo: Jason Wimbiscus)
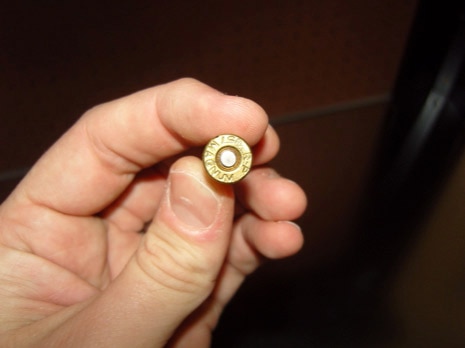
The case is now primed. (Photo: Jason Wimbiscus)
Step 3: Bell the case mouth
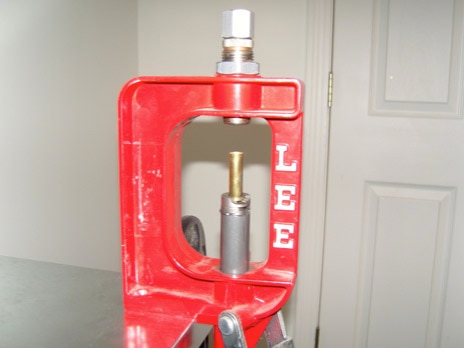
Screw the expander die into the press and lock the case into the shell holder. Pull down on the lever and bring the case into the die. Be sure to set the die so the case mouth is belled just enough to start the bullet during the seating process. Over-belling will reduce the life of the case. (Photo: Jason Wimbiscus)
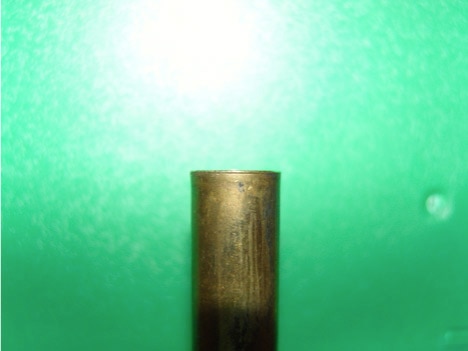
The above photo demonstrates a properly belled case mouth. (Photo: Jason Wimbiscus)
Step 4: Make ready the powder and loading block
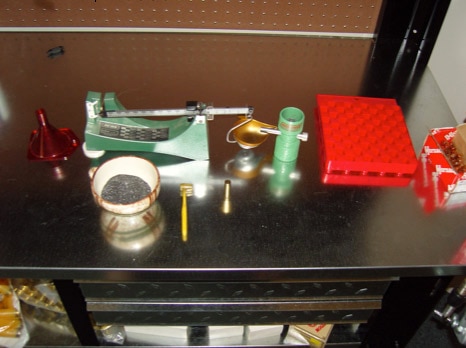
Prior to charging cases, place everything needed in convenient locations on the bench. Fill the hopper of the powder trickler and place a generous amount of powder in a wide mouth container. (Photo: Jason Wimbiscus)
Step 5: Calibrate the Scale
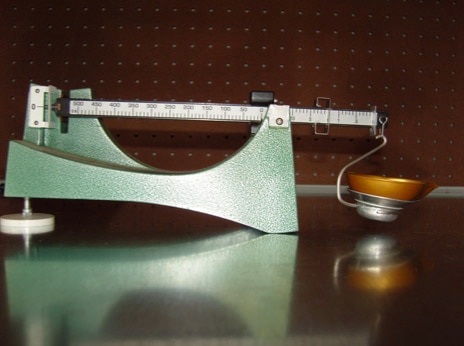
A good scale is crucial to safe handloading, but a top end digital scale is not necessary. The author has found the RCBS 5-0-5 scale pictured above to be more than adequate for all loading tasks. It is wise to check the accuracy of any scale by using check weights of a known mass prior to weighing any powder charges. (Photo: Jason Wimbiscus)
Step 6: Weigh the charge
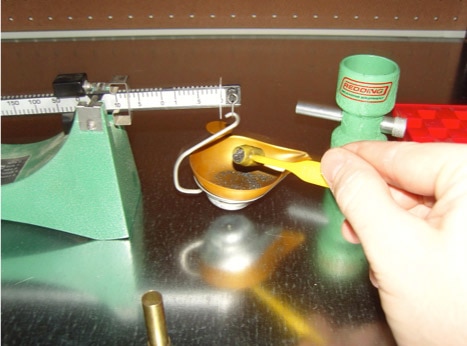
Set the scale to the desired powder mass and using a powder dipper, gradually add powder to the pan until the beam begins to move. (Photo: Jason Wimbiscus)
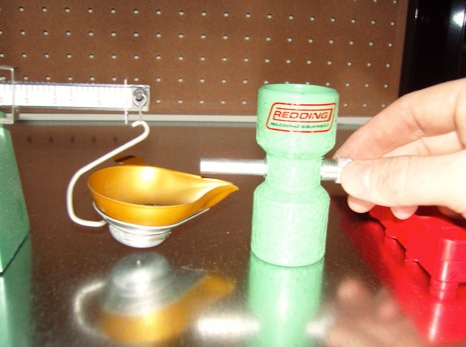
Finish balancing the scale by adding powder gradually with the trickler. (Photo: Jason Wimbiscus)
Step 7: Charge the case
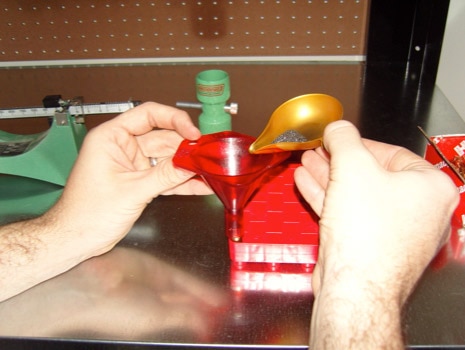
Using the powder funnel, transfer the powder from the scale’s pan to the case. Powder measures do exist that dispense a pre-measured charge into a case with a pull of a lever, thus reducing the amount of time to charge a quantity of cases. Charging each case individually by hand, however, will result in more consistent charges from round to round. (Photo: Jason Wimbiscus)
Step 8: Conduct a visual powder level check
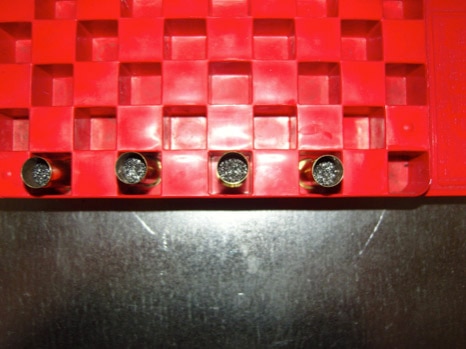
After charging a number of cases, use a flashlight to look into the case, taking note of any rounds that appear to have too much or too little powder. The powder levels in all cases should look the same. (Photo: Jason Wimbiscus)
Part IV: Seating and crimping
Step 1: Seat the bullet
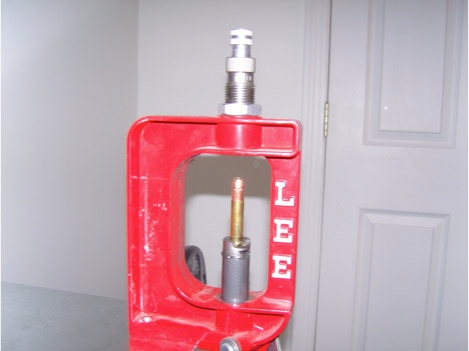
It may be necessary to hold the bullet in place with a free hand until it enters the die. (Photo: Jason Wimbiscus)
Screw the bullet seating die into the press and lock the case into the shell holder. There is an adjustment knob on the top of the die that controls seating depth. Loosen this knob until it wobbles slightly within the die. Next, place a bullet in the case mouth taking care to keep it as level as possible and raise the ram until the case enters the die. It may be necessary to hold the bullet in place with a free hand until it enters the die.
With the cartridge inside the die, tighten the adjustment knob until it is stopped by the bullet. Back the cartridge out slightly and tighten the adjustment knob slightly. Raise the ram into the die to seat the bullet deeper into the case. Using a set of calipers, check the length of the cartridge. Continue to gradually tighten the adjustment knob and seat the bullet deeper into the case until the overall cartridge length is within the specifications of the loading data. The die is now set to enable fast seating of subsequent cartridges.
Step 2: Crimp
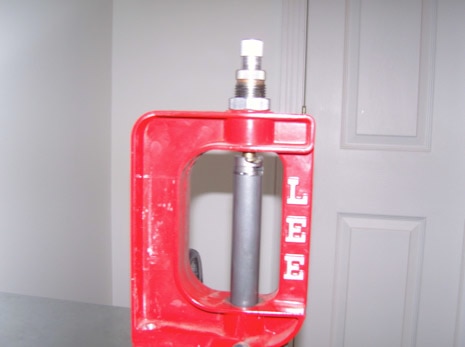
There are a variety of methods of crimping the case mouth to the bullet. (Photo: Jason Wimbiscus)
Cartridges that will be loaded in firearms with tubular magazines must be crimped to ensure the bullets won’t push deeper into their cases while end-to-end in the magazine. Additionally, uncrimped rounds in heavy recoiling revolvers can creep out of their cases, tying up the gun.
There are a variety of methods of crimping the case mouth to the bullet, but the easiest is by using a die specifically designed to apply a crimp.
To crimp using the Lee crimp die, screw the die into the press and lock the cartridge into the shell holder and raise the cartridge all the way to the die. Tighten the adjustment knob until the cartridge prevents it from going any further. Back the cartridge out of the die and tighten the adjustment knob by an eight to a quarter of a turn. Raise the round into the die again, then back it off and examine the crimp. Continue to gradually tighten the adjustment knob and raise the cartridge into the die until the desired crimp is attained. The die is now set for crimping subsequent cartridges.
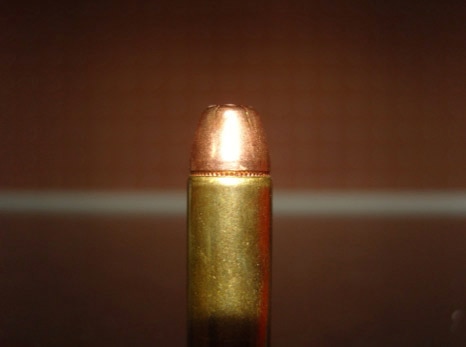
The photo above demonstrates a crimped and completed cartridge. (Photo: Jason Wimbiscus)
Part V: Safety tips
- Loading one’s own ammunition can be perfectly safe as long as some common sense precautions are taken.
- Work up to maximum charges incrementally, starting with charges that are 10% of the maximum.
- Adhere to manufacturer data. Substituting components not in accordance with manufacturer data can cause pressure spikes. Do so at your own risk.
- Do not load while distracted or impaired.
- When firing handloaded ammunition, be aware of signs of excessive pressure including sticky bolts, blown out primers, split cases, and unusually high recoil or report. If such signs manifest, discontinue firing rounds from that lot.
- Be aware of report and recoil that is unusually light. This could mean a squib, or underpowered load and a bullet could be lodged in the barrel. Firing more rounds could be disastrous.
- A dud may actually be a hang-fire. Keep the muzzle in a safe direction for several minutes before attempting to unload.
- Only use handloaded ammunition in the firearms for which they were developed.
- For liability reasons, do not give others your handloaded ammunition.
- The use of handloads will often void manufacturer warrantees on firearms.
- Always err on the side of caution.
The post A fully illustrated beginner’s guide to handloading appeared first on Guns.com.
