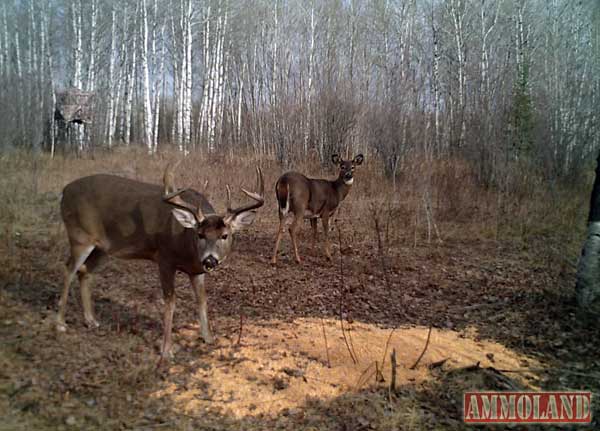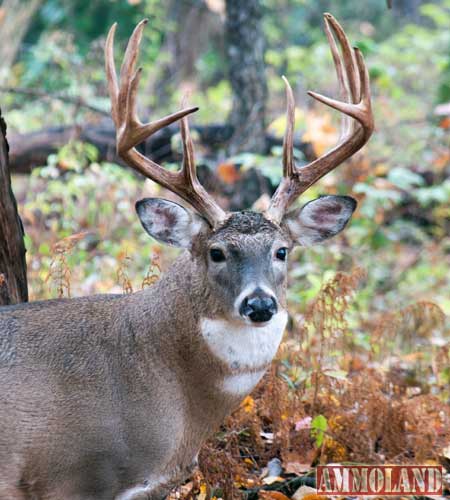
United States -(Ammoland.com)- Most whitetail enthusiasts don’t run their trail cameras through the early summer months for several reasons; one being, a buck’s antlers haven’t developed to a point of distinguishing them from other bucks.
Next month is the perfect time to get your cameras working for you and following are a few thoughts to help you get the most from your trail cameras.
1) Choose the right camera. The worst cameras today are better than the first flash cameras that hit the market. The two most important features are an infrared flash and a quiet shutter. No animal, including whitetails, like to have a whopping, white explosion go off in their face when it’s pitch black. Flash cameras spook wildlife, period. You must also have a quiet shutter. If you get photos of the animal looking at your camera, it could be hearing your shutter.
- You may also want certain other features like better resolution, time-lapse, burst mode, video, password protection or built in viewer. It all depends upon your personal needs, but like most things…you get what you pay for.
2) Angle the camera to the trail. Trigger speeds have come a long way in recent years, but if you’re covering a trail or a passage where the animals will pass by relatively quickly, it’s best to angle the camera (about 45 degrees) to the trail rather than placing it perpendicular to the trail. If the camera is placed at a right-angle to the trail and the animal passes through the sensor area traveling fast, you may only have an image of a hind-end or no animal at all.
3) Use your cameras to back-track specific bucks. If a buck is showing up at a food plot or feeding station after dark and you don’t have snow to back track him to his bedding area, let your trail camera do the work for you. The closer you get to their core area, the better your chances for a shot during legal shooting light. The key is to keep your cameras moving. A buck may simply walk five feet out of your camera’s sensor area, so keep repositioning them. Follow your buck back in to a spot where you have a good chance of killing him during legal hunting hours.
4) Place the camera south of your target area and remove all debris. At times you may also get away with facing your cameras to the south, it depends upon the time of the year as the sun’s angle to the earth will change. It’s really the sunrise and sunset that you should try to avoid. By facing the camera in a northerly direction your daytime photos should have the best lighting.
- Make sure to remove all obstructions. Cut branches, weeds and twigs out of the way. Below you’ll see it’s suggested to use natural foliage to keep the camera concealed and hide it from thieves, but if you do, just make sure you have a clear path to your target area. Otherwise the LEDs will light up the brush in front of the camera leaving your target underexposed. It can also cause false triggering. If a large, sun-saturated branch is passing in front of the camera’s sensors you’ll have an SD card full of animal-less images.
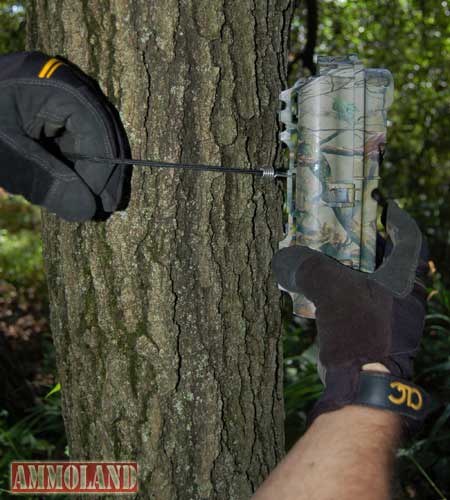
5) Camera thieves suck! Deter camera crooks by concealing the camera, securing them to a tree with a cable and lock, hanging them in hard to reach spots or placing them in a locked steel box. Nothing seems to stop a really determined camera bandit, but to begin you must use some common sense – don’t hang your camera in an obvious location. A camera hanging on a trail, next to a feeder or at a gate opening may be a bit too tempting. Find a less obvious spot and camouflage the camera into the surroundings.
- One of the best ways to discourage theft is to hang the camera high in the tree. Bring a climbing stick section, a couple tree-steps or a small ladder and hang the camera out of reach of the average person. Remember, if you hang it high, you’ll need to place a branch or wedge behind the camera to angle it downward.
- Security chains and cables work well to deter most, but sometimes if a camera pinching puke can’t take the camera, they’ll destroy it. Again, if a resolute crook wants the camera they seem to find a way – unfortunately a pair of bolt cutters fits in a backpack. Lastly, some cameras have security boxes that can be fastened to a tree and then the camera locked into the box.
- It is possible to use a second, better hidden camera to catch a camera thief. If you place a second camera pointed at your original camera and make sure to conceal it VERY well, it’s possible to catch some of these brainless camera-nabbing crooks. The penalty for vandalism or theft is much greater than trespassing.
6) Take advantage of the time-lapse feature. This means the camera is triggered at predetermined time intervals rather than movement through the sensor area. Time-lapse is a great feature for covering food plots, agricultural fields or any large open area. If you can’t figure out which trails deer are most often using to access a food source, time-lapse can teach you.
- Time-lapse is also a great feature for scouting turkeys. It can tell you areas gobblers prefer for strutting zones/bugging areas and where it’s best to set up your ambush.

7) Use scent for a stopper. A small amount of scent placed in your chosen spot can stop your buck in the perfect position to pose for his portrait. A little Trail’s End #307 or Golden Buck will work during early season or after the rut, and Special Golden Estrus or Mega Tarsal Plus will stop them in their tracks and draw them in during late October through November. Place the scent on a Key-Wick and then put it on a branch or twig about four feet off the ground.
- Mock scrapes work amazingly well to take an inventory of the bucks you have in your area. You may not get many photos of does, but bucks are instinctually drawn to the scrape from early October into December. You can “doctor-up” a buck’s natural, existing scrape or make your own mock scrape. A Magnum Scrape Dripper with some Active Scrape or Golden Scrape will work best for this tactic.
8) Develop a system for filing your photos. To really effectively manage a property you must be good at keeping records. Trail camera photos are one of the primary ways to keep on top of what’s happening on your property. They help you to gather information on mature bucks, document trends over the years and there is no better way to determine density, buck to doe ratio or age structure of your herd. Now days, one property manager on a 500 acre parcel can go through 200,000 images or more in one season. Whether you categorize your files by date, place where the camera was located, the specific buck you’re after or some other system, it’s important to find a way to organize your images so you can find them when you need to recap.
9) Shoot a test photo/video so you know it’s framed properly. If your camera has a built in viewer this will be easy, but you don’t want your camera to capture just legs or half a set of antlers. Consider using a digital picture viewer so you can check over your photos in the field. Small digital cameras may also work for you.
10) Find the sweet-spot. Most cameras will claim they are good to a certain range… when in reality, they stink at the maximum touted limit. Set them close enough to your target to get good nighttime illumination on the subject from your infrared flash.

11) What are some camera manufacturers thinking with their mounting systems? The strap some of them give you to fasten your camera to a tree could double for a seatbelt in a car and it requires two people to get it around a tree. A simple small rubber cord (bungee-cord) with hooks at each end works perfectly if you’re not worried about theft. Otherwise, with mounting systems like the “Stake Out” or “Stic-n-Pic” you don’t need a tree at all. Some trail-cams will work with a regular camera tripod. There are numerous other mounting options, but it’s nice to have something simple and fast.
12) How and when should you check your cameras? Some say you must wait a certain time-span and check them at a specific time of day, but every situation is different. In some instances you may need to check them every day or every-other day. Under other scenarios you may want to wait a week to ten days or more before you check them. Variables would be the time of year, location of the camera(s), what you’re trying to do with your camera, how you’re checking the cameras, weather conditions and more. The idea is to check or move your cameras when you will disturb the area the least.

Since an ATV or some farm vehicles are less intrusive than a person on foot, some choose to mount their cameras so they can drive right next to the camera to switch out SD cards. This is less of a disturbance than walking in on foot because whitetails will stay bedded and will tolerate the vehicle passing by, where a person on foot would bump them to the next property. If you’re able to drive right to your camera you also leave much less human scent in the area.
Would you like to learn more about improving your hunting and get discounts on the products you need? Learn from the experts by joining the new Mossy Oak GameKeepers Club at www.gamekeepersclub.com or call 662-495-9292.
About Mossy Oak GameKeepers Club
Mossy Oak GameKeepers shines a light on what can be done to enhance wildlife and hunting opportunities. Highlighting multiple species of wildlife and the efforts of Gamekeepers, the magazine (formerly Farming For Wildlife) and new television on the Pursuit Network makes managing wildlife a twelve month project and a true labor of love.
Subscribe to the magazine at www.farmingforwildlife.com
